
Symbol:
ID-2900-10M
EAN:
5901874274618

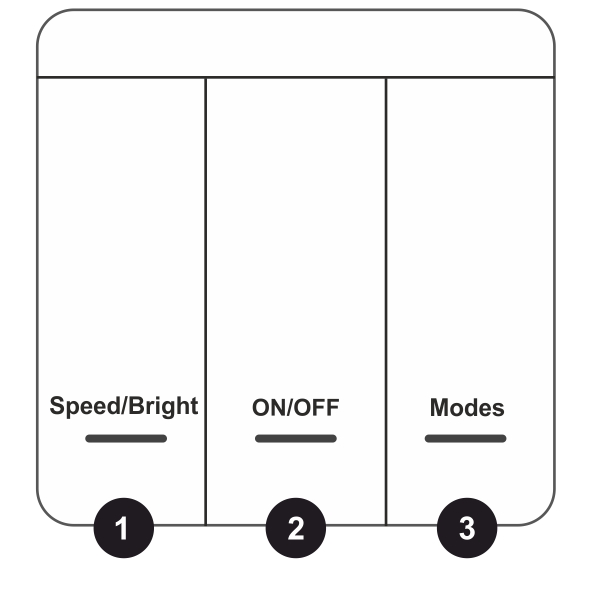
Panel buttons:
First button -speed adjustment and brightness adjustment (speed adjustment function when the light is on, and brightness adjustment function when the light is off)
Second button -turn on/off the light
Third button -change effect mode
Factory mode -pressing buttons 1 and 3 simultaneously when the light is on will restore the default factory mode
Adjustment of the number of controller points:
When the light is off, press and hold the "Modes" button for 5 seconds to enter the point adjustment menu. The "Speed/Bright" button is for adding points, and the "Modes" button is for subtracting points. Press and hold to adjust quickly, after adjustment press the "ON/OFF" button to save and exit.
By default, there are 80 integrated circuits, and the maximum can be set to 3200 integrated circuits.
If multiple controllers are used at the same time and we do not want their switches to interfere with each other, it is necessary for the controller to learn the appropriate switches.
Coding:
1. First, disconnect the power from the controller, that is, disconnect the power from the power supply, and the controller and LED strip will turn off.
2. Press and hold the "Modes" button, then connect the power to the controller, and the LED strip will blink three times quickly to successfully learn the code.
At this moment, only the coded switches can control the controller. One controller can learn six switches.
If you want to erase the code and resume control with all remotes.
Decoding:
1. First, disconnect the power from the controller, that is, disconnect the power from the power supply, and the controller and LED strip will turn off.
2. Press and hold the "Speed/Bright" button, then connect the power to the controller, and the LED strip will blink three times slowly, and all switches will be restored to their normal code state.
In the case of a "single open switch," only the learning coding function is available, and the controller cannot be cleared.
Method of setting "single water flow channel (1 integrated circuit divided into 3 channels)" or "single water flow (one integrated circuit)":
single water flow(one integrated circuit): can control a maximum of 3200 integrated circuits 400 meters, the flowing water effect is not so smooth (factory setting for water flow for a single integrated circuit).
single water flow channel(one integrated circuit is divided into 3 channels): can control a maximum of 3200 channels or 1066 integrated circuits (one integrated circuit three channels) is 133 meters, and the current water effect is very delicate and smooth (the order of RGB channels needs to be adjusted).
One integrated circuit = one section of the strip (strip cutting section)
Adjustment method:
When the light is on, press and hold "Modes" for 10 seconds until the LED strip blinks twice to enter the channel sequence adjustment menu. At this point, press "Speed/Bright" to adjust the channel sequence, and 12 points on the LED strip will show the effect of single water flow; if the channel is correctly adjusted, the LEDs will flow sequentially from the first point to the 12th point; if the channel is not correctly adjusted, the LEDs will cross and flow irregularly. After adjusting the correct channel sequence, press the "ON/OFF" button to save and exit.
There are a total of 7 sequences, namely:
1. single channel of the integrated circuit, 2. RGB, 3. RBG, 4. GRB, 5. GBR, 6. BRG, 7. BGR the correct channel sequence must be adjusted to work properly.


